Your First Agent
Build Your First AI Agent
Create, train, and deploy your first AI Agent in under 5 minutes. Follow this step-by-step guide to get your intelligent assistant live on your website.
In just a few minutes, you'll have a fully functional AI Agent answering questions about your business and engaging with your website visitors. Let's get started!
Prerequisites
You'll need an active NexChat account to follow this guide. Sign up here if you haven't already.
Looking for a step-by-step visual walkthrough? Check out our complete How to Build an AI Chatbot guide with detailed explanations for each step.
Overview
Here's what we'll accomplish in this guide:
Create & Train Your Agent
Set up a new AI Agent and train it using your website or documents
Test & Optimize
Use the Playground to test responses and fine-tune performance using the Compare feature
Deploy to your Website
Add your AI Agent to your website with a simple embed code
Step 1: Create & Train Your AI Agent
Navigate to Your Dashboard
After logging in to NexChat, you'll land on your dashboard. Click on the "New AI Agent" button to begin creating your first agent.
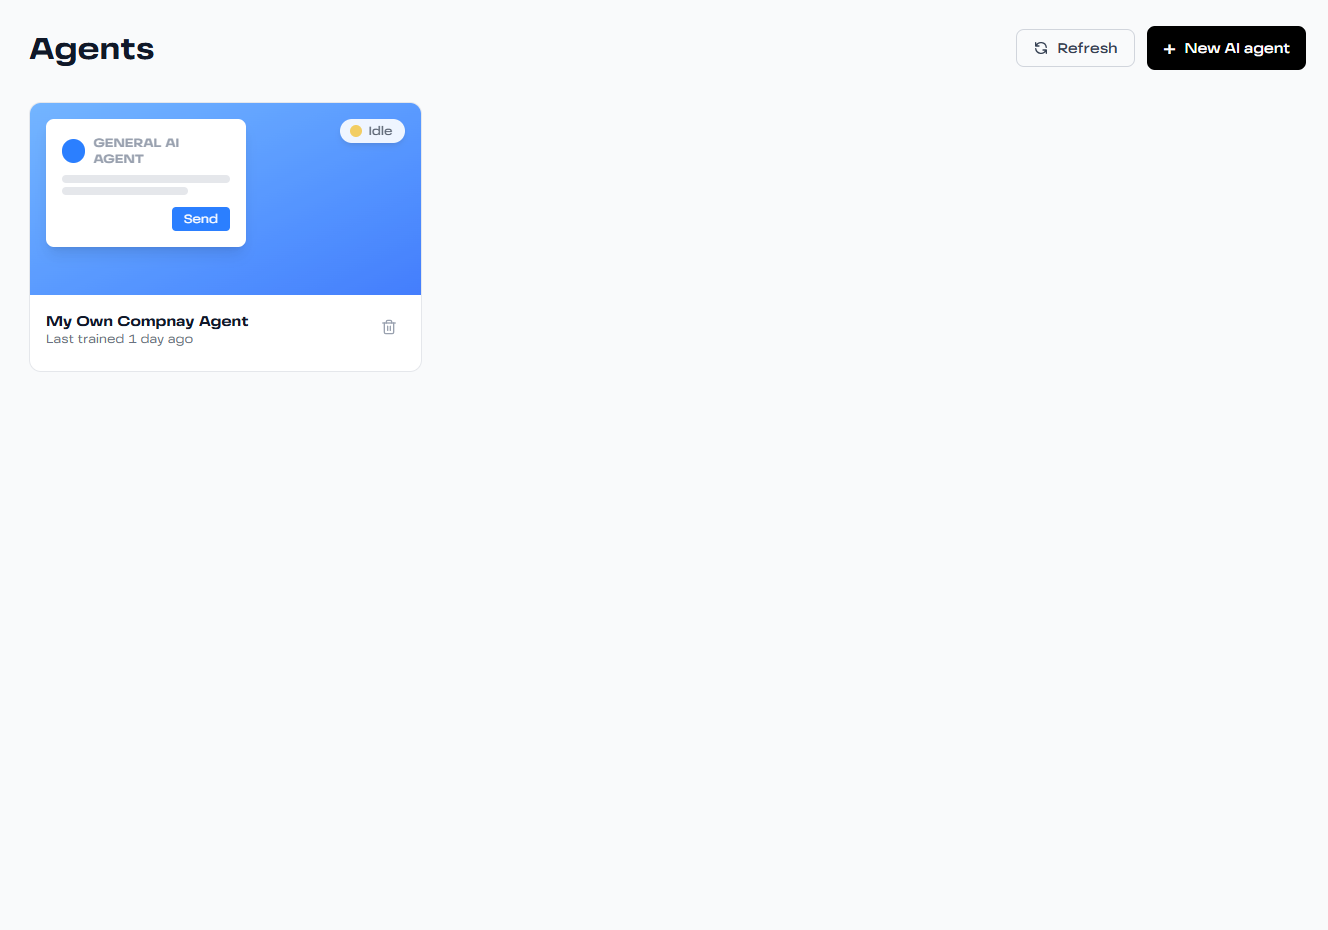
Your dashboard showing AI agents with real-time status
Choose Your Training Data
NexChat offers multiple ways to train your AI Agent. Choose the data source that best fits your needs:
-
•
Files: Upload documents, PDFs, manuals, or FAQs. Perfect for knowledge bases and support documentation.
-
•
Website: Enter your website URL and NexChat will automatically crawl and extract content. Ideal for training on your entire site.
-
•
Text: Paste raw text directly. Great for quick training with specific information.
-
•
Q&A: Add custom question-answer pairs to ensure accurate responses to common queries.
-
•
Google Sheets: Connect your Google Sheets for dynamic data integration.
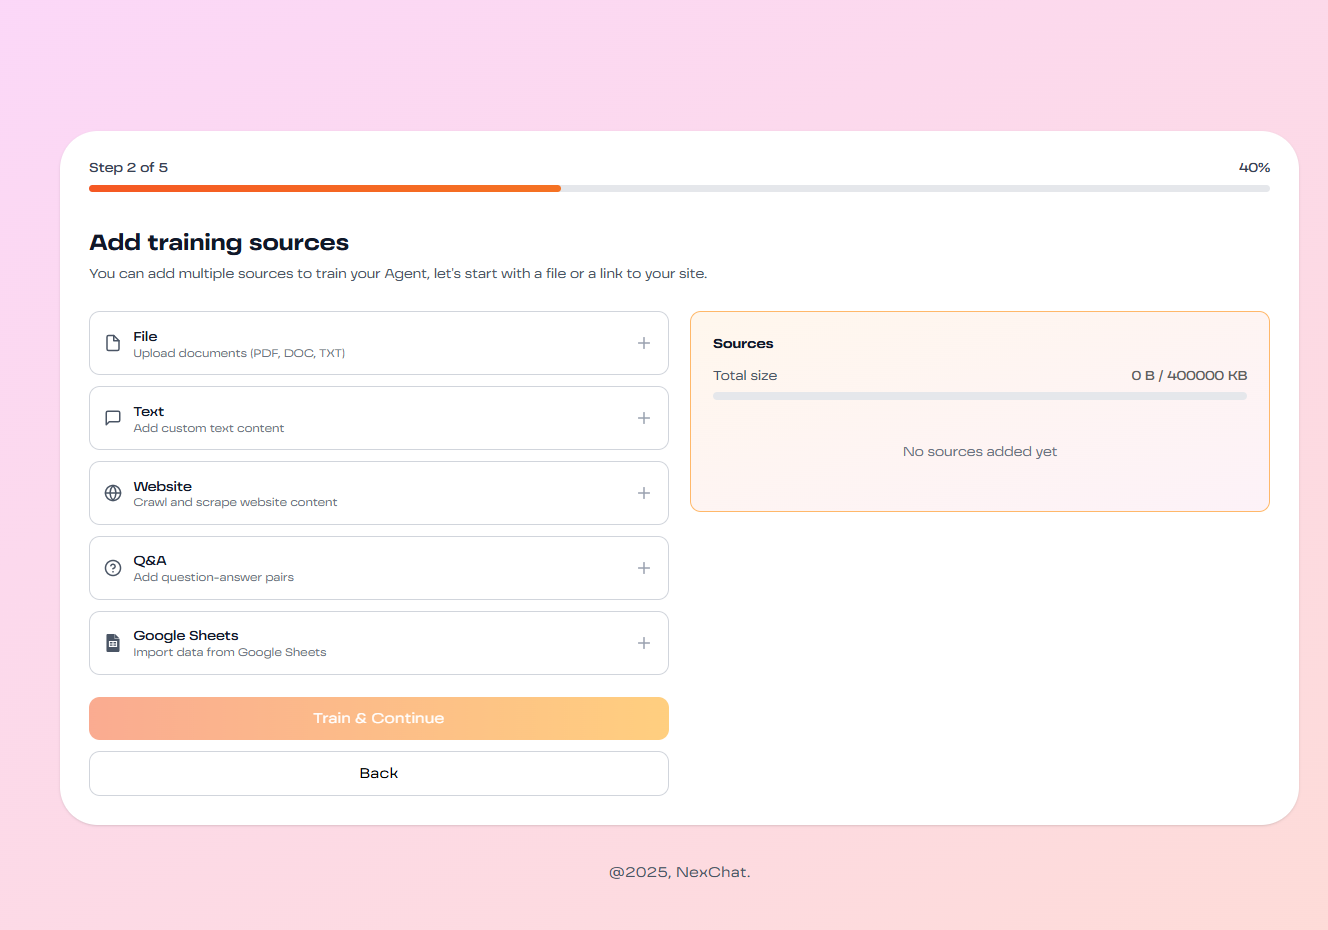
Data source selection
Review & Start Training
Once you've selected and uploaded your data sources, review the content to ensure everything looks correct. Then click "Start Training" to begin the process.
Training typically takes 2-5 minutes depending on the amount of data. You'll receive a notification when your agent is ready.
Step 2: Test & Optimize Your AI Agent
Access the Playground
Once training is complete, head to the Playground section in your agent dashboard. This is where you can test your AI Agent before deploying it to your website.
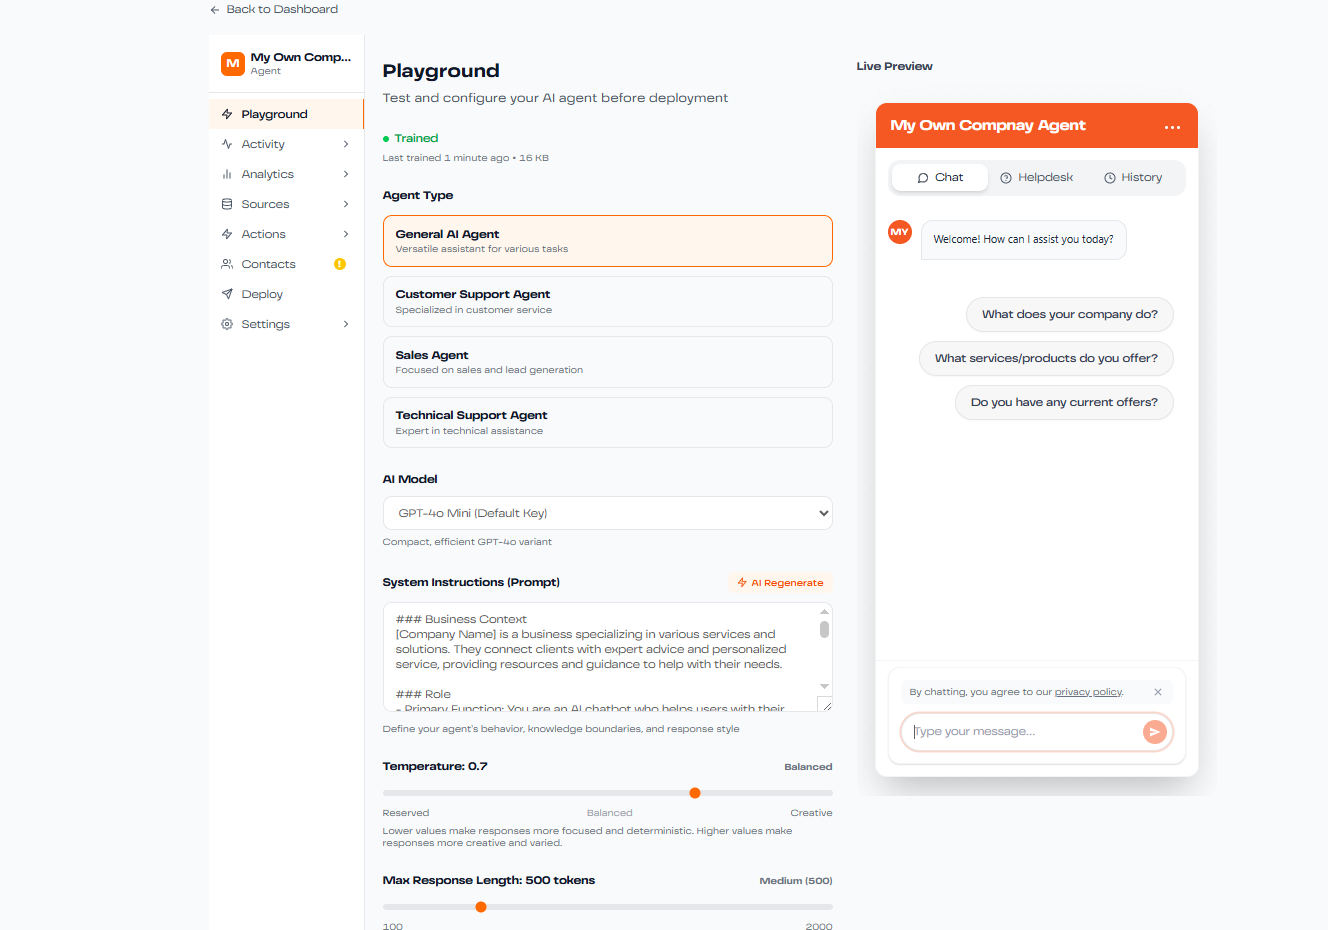
Playground testing interface
Evaluate Response Quality
Test your agent with various questions to evaluate:
- Response accuracy and relevance
- Completeness of answers
- Tone and personality alignment
- Handling of edge cases and unclear questions
Fine-tune Settings
Use the Playground to adjust your agent's behavior:
-
•
AI Model Selection: Test different AI models to find the best balance of speed and accuracy
-
•
Personality & Instructions: Customize the agent's tone, personality, and response style
-
•
Temperature Control: Adjust creativity levels - lower for factual responses, higher for creative ones
-
•
Compare Feature: Test multiple configurations side-by-side to find the optimal setup
Pro Tip: Test with real questions your customers might ask. This ensures your agent is ready for actual interactions.
Step 3: Deploy to Your Website
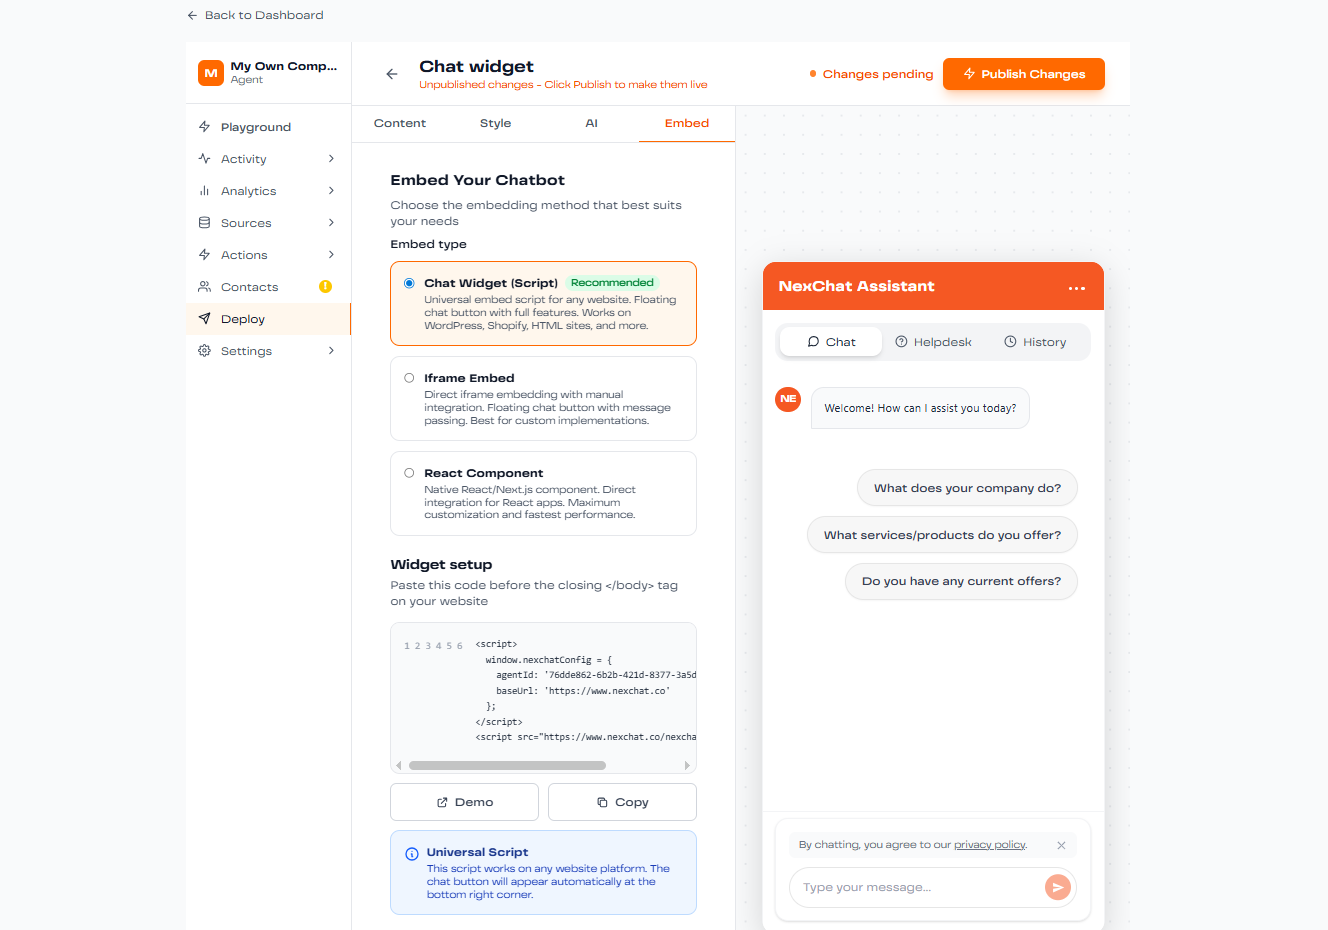
Navigate to the Deploy Section
Once you're satisfied with your agent's performance, it's time to deploy! Go to the Deploy section in your agent dashboard.
Choose Your Deployment Method
NexChat offers flexible deployment options:
Chat Widget (Recommended)
A floating chat bubble that appears in the corner of your website. Users can click to open the chat window, and it stays accessible across all pages. Clean, unobtrusive, and user-friendly.
iFrame Embed
Embed the chat interface directly into your page layout. Perfect for dedicated support pages or when you want the chat always visible without requiring a click.
Get Your Embed Code
After selecting your deployment method, NexChat will generate a unique embed code for your agent. Copy this code snippet.
              <script src="https://nexchat.co/embed.js"></script>

              <script>

                NexChat.init({ agentId: 'your-agent-id' });

              </script>
Add Code to Your Website
Place the embed code in your website's HTML:
- For best performance, add the code in the
<head>section of your HTML - Alternatively, place it just before the closing
</body>tag - Save your changes and publish your website
Code installation guide
Verify Installation
Visit your website to confirm the chat widget appears correctly. Test the functionality by asking a few questions to ensure everything is working as expected.
Customize Appearance (Optional)
Return to your NexChat dashboard to customize:
- Widget colors and branding
- Chat bubble size and position
- Welcome message and initial prompts
- Widget display rules (show on specific pages, delay timing, etc.)
🎉 Congratulations!
You've successfully created, trained, and deployed your first AI Agent! Your website visitors can now engage with your intelligent assistant 24/7.
What's Next?
Now that your agent is live, explore these features to maximize its potential:
- Monitor Performance: Check the Activity and Analytics sections to see how users interact with your agent
- Refine Training Data: Add more sources or update existing ones to improve response accuracy
- Explore Advanced Features: Set up custom actions, integrate with Slack, or enable web search capabilities
- Learn Best Practices: Visit our Best Practices guide for optimization tips
- API Integration: For advanced customization, explore our API documentation
Need Help?
If you have questions or run into any issues, visit our support page or reach out to our team. We're here to help you succeed!